P-Cap, MoCap and All That Jazz Part 2
by Jim Tanenbaum, CAS
Set Procedure
The capture techs will have an earlier call so they can calibrate the volume. This involves placing a single reflective marker at specified positions so the computer can associate them with the images in the capture cameras. The marker is mounted on a rod, usually the same length as the side of the grid squares. First, the rod is used as a handle to position the marker on the floor at each intersection of every grid line. The system will beep or chirp when it has calibrated that point so the tech can move on to the next one. When the floor grid is calibrated, the other end of the rod is placed at each of the intersections, and held vertically with the reflector at a fixed distance directly above the spot, and the procedure repeated. During the calibration, the volume needs to be kept clear of other crew people.
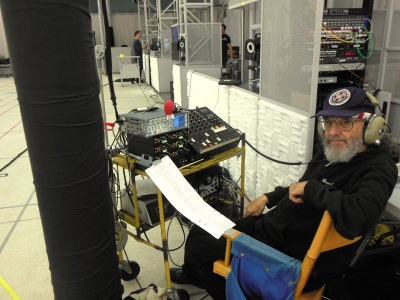 Reflective objects are verboten in or even near the volume. Any Scotchlite strips on shoes or clothing need to be taped over, and if the anodizing is worn off of the clutch knobs on your fishpole, they will need to be covered with black paper tape. Some poles’ shiny tube sections are a problem too, and black cloth tubular shrouds can be purchased to slip over the entire fishpole. J.L. Fisher has black-anodized booms available to rent for use on capture shoots. If you have work lights on your cart, be sure their light bulbs are not directly visible to any of the capture cameras.
On most shoots, you will have only a single assistant, either to boom or to help with the wireless mikes. This means that the smaller and lighter your package is, the easier it will be to set up, move and wrap.
I make it a habit to run on batteries at all times. This avoids problems with hum from ground loops because you are tied into the studio’s gear through your audio sends, and also the possibility of having your power cord kicked out of the wall outlet. Being a belt-and-braces (suspenders) man, I also use isolation transformers in my audio-out circuits. (See my cable articles in the Spring, Summer and Fall 2012, and the Winter 2013 issues of the 695 Quarterly.)
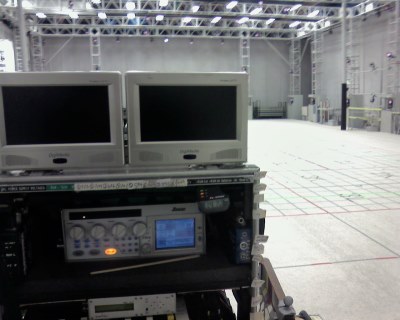 The usual recording format is mix on Channel 1, boom (if used) iso’d on Channel 2, and wireless mikes (if used) iso’d on succeeding channels. You will send a line-level feed of your mix to the IT department, where it will be distributed to the reference cameras and imported into the editing software. Your isos may also be sent into the system during production.
Metadata may be conventional (Scene 37a, Take 6) or extremely esoteric and complex (195A_tk_00E_002_Z1_pc001_0A01_VC_ Av001_LE). Hopefully, you will be allowed to abbreviate long ones like this—I was able to get away with: Scene 195A_00E_002, and Take 2, but since the last digit of the “scene” number was also the take number, I had to manually advance it every take. Fortunately, the Deva allows me to make corrections retroactively, but it is still a nuisance so I’m very careful when I enter the data initially. Discuss metadata requirements with production as soon as possible.
Digital sound reports are very convenient, but you need to secure your tablet carefully; the cost of replacing a dropped Galaxy or iPad overcomes any amount of convenience.
Comtek monitors can be a problem because of system delays in the video display screens, which are often non-standard and even variable. Many directors will want to see and hear playback during the day. I have found that the simplest solution is to get a feed of your mix back from IT and send that to the Comtek transmitter. They should automatically have the correct delay for both direct and playback. Unfortunately, a number of new, smaller volumes have sprung up, and they sometimes do not have any means to compensate the audio for the video delay. Behringer makes an inexpensive variable-audio-delay unit called the “Shark,” and it is worthwhile to carry two of them along with an XLR switch so you can quickly feed your Comtek with the appropriate delay for direct and playback audio. Your direct mix will go into delay 1, and the mix return from playback will go into delay 2. The XLR switch will be used to select the output of either delay as required to feed your Comtek transmitter.
A problem with sending your mix and isos into the capture system in analog form is that the gain structure of their audio channels may be less than optimal, and more importantly, accidently be changed after you have adjusted it initially. If you can have any control over the infrastructure, try to get a digital audio (SMPTE/ EBU) audio path so you won’t have to worry about this, or hum/ buzz pickup.
It is vitally (and virtually) important to discuss digital audio parameters with the IT department. The most common TC frame rates are 23.98 and 29.97, but 24 and 30 are also encountered, and you must be sure to use the correct one. Although you can use 29.97 with a 23.98 system, and 30 with a 24 system—the rates can be converted without too much trouble—it is much more difficult (and expensive) to use 30 with a 23.98 system, or 29.97 with a 24 system. Usually, you will get a TC feed from the capture system. Ask specifically about the user bits—some systems have fixed random digits that remain unchanged from day to day. If you are working more than one day on the shoot (and remember that sometimes a one-day job runs over and requires a second day), it is important to put the date (or some other incremented number) into the user bits yourself to avoid duplicate TCs.
There are two “standards” in TC circuitry: BNC connectors at 75 and 3-pin XLRs at approximately 110. Unfortunately, these parameters are not universal, and to make matters worse, some facilities have built up their own infrastructure and have patch panels with connectors that are fed from equipment with the inappropriate impedance.
 Unless long cable runs are involved, this impedance mismatch usually does not cause problems. (See the cable articles for using balun transformers.) The best you can do is to use mike cables with XLR TC sources and 75 coax cables with BNC TC sources. If this does not match the TC input connector of your recorder, try a simple hard-wired adapter before going to a balun. If the recorder’s display shows a solid indication of the proper frame rate and there are no error flags, you are probably okay. If this is a long-term project, you should have time for a pre-production test, if not, cross your fingers. (Or invest $10,000 in a time-domain reflectometer to measure the jitter in the “eye pattern” and determine the stability of the TC signal at your end.)
When it comes to wireless-mic’ing the capture suits, there is good news and bad news. The good news is that you don’t have to hide the transmitter or mike. The bad news is:
1. There is a tremendous amount of Velcro used on capture suits, and it can make noise when the actor moves. Applying gaffer tape over the offending strip of Velcro will sometimes quiet it. For more obdurate cases, a two-inch-wide strip of adhesive-backed closedcell neoprene foam (aka shoe foam) may prove effective. As a last resort, one or more large safety pins fastened through both sides of the Velcro usually works.
2. Mounting the mike capsule requires some forethought. If no facial capture camera is in use, the top of the helmet opening can be used to mount a short strut to hold the mike in front of the forehead. I use a thin strip of slightly flexible plastic, 1–2 inches in length. If a face-cap camera is used, its mounting strut can be used to secure the mike, but in both cases, be sure to keep the mike positioned behind the vertical plane of the performer’s face to help protect against breath pops. Also, the exposed mike is susceptible to atmospheric wind, or air flow from rapid movement of the actor. I have found that a layer of 100% wool felt makes an excellent windscreen, especially when spaced away from the microphone element about 1/8 inch. (Incidentally, felt can be used to windscreen mikes under clothing as well.)
3. Because the mike is located so close to the actor’s mouth, it is exposed to very high SPLs. Many lavaliers overload acoustically at these levels, so turning down the transmitter’s audio gain doesn’t reduce the distortion. Both Countryman and Sanken make transmitter-powered models designed for higher SPLs, but not quite high enough. The problem is that the mikes require at least 5 volts of bias for these peak levels, and most wireless mike transmitters supply only 3.3 to 4 volts. An inelegant fix is to use one of these mikes with an external, in-line battery power supply, because their extra bulk doesn’t have to be concealed. The other side of this coin is that these high-SPL mikes are noisier at low dialog levels. Be prepared to quickly switch back to the low-SPL mikes between loud and quiet dialog scenes. Another possibility, if you have stereo transmitters (currently only available from Zaxcom), is to employ two different mikes, one for high levels and the other for low, and iso them both.
4. There may be other electronics mounted on the actor’s suit that can interfere with your wireless mikes. If a face-cam is in use, there will be a digital video recorder and timecode source. This may be an onboard TCXO, or a receiver for an external reference. Another possibility is a transmitter to send locally generated TC to the capture system. If real-time face monitoring is present, there will be a video transmitter, either in the WiFi band (2.4 GHz) or on a microwave (above 1 GHz) frequency. If active markers are functioning, they may receive and/or transmit an RF synchronizing signal. The RF from any of these transmitters can get into your wireless either through leakage in the transmitter case or through the lavalier’s capsule housing, cable or plug. Keeping your gear as far from any of these transmitters and their cables is the first line of defense.
5. If motion control apparatus is being used, there may be multiple RF links involved, all at different frequencies. As soon as possible, coordinate frequencies with the appropriate department(s).
6. The reference video cameras, if camcorder types, may have video monitor transmitters. Some of them still use the old analog Modulus units, and they present very serious interference problems.
7. Walkie-talkies usually operate well above or below your wireless frequencies, but at 5 watts they can cause trouble if close to the actor or your sound cart.
8. For general wireless mike problems, see my radio mike article in the Spring 2011 issue of the 695 Quarterly.
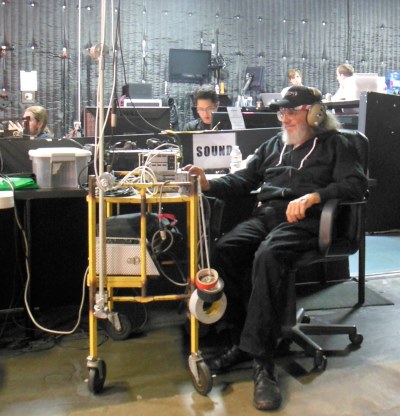 When it comes to booming a CGI–capture scene, there is good news and bad news. The good news is that you don’t have to worry about boom shadows. The bad news is:
1. You can’t block the view of the reference cameras. When 12 of them are in use simultaneously, it can be hard to keep track of all of them. But the mike and boom can be visible in the reference camera(s) as long as it isn’t between them and an actor’s face (or key part of the body).
2. There is no such thing as “perspective” in a captured scene, since it can be rendered from a POV at any distance. Every shot needs to be mic’ed as closely as possible. Distance is easily added in Post, especially now that we have DSP (Digital Signal Processing), but cannot be removed.
When it comes to booming a live-action capture scene, there is good news and bad news. The good news (if any) is dependent on various factors. The good/bad news is:
1. It depends on the particular project as to whether the mike and/ or boom can be in frame. For green/blue screen work, a green or blue cloth sleeve is available for the pole, and similarly colored foam windscreens for the mike. Also, appropriately colored paper tape can be used to cover the shockmount, or acoustically transparent colored cloth can shroud both mike and shockmount. Be sure the cloth is far enough from the mike that it does not rub when moved.
2. For non-screen work, the ordinary booming rules about shadows and reflections apply, except…
Now that HD video is the norm, there is no film “sprocket jitter” to make the matt lines stand out, and there is no “generation loss” from optical film processes. This, plus the much lower cost of video image processing compared to film, has made producers and directors less reluctant to use it. Offending objects can be removed from a shot relatively easily, and this can include mike booms. (Of course, this is no license for sloppy work.)
Another use of CGI solved a problem that has plagued filmmakers from the very beginning: reflections of lights, cameras and crew in shiny surfaces. Bubble faceplates on spacesuits were a particular problem. (We had to build a quarter-million-watt artificial sun for single-source lighting on the TV miniseries From the Earth to the Moon, in major part because of the astronauts’ mirrored visors.) For Avatar, most of the exopack masks were only open frames, with red fiduciary (computer-tracking) dots around the edge. CGI faceplates were added in Post, complete with the appropriate reflections of trees, sky, other characters, etc. Many of the windows in vehicles were CGI’d in the same manner. This provided a rare benefit to the sound department: the ability to shoot through a “closed” window or a facemask with a boom mike.
When it comes to setting levels and mixing the production (realtime) scratch mix for a capture scene, the usual live-action esthetic and dramatic considerations do not apply:
1. As just mentioned, there is no “visual perspective” as such for a given take, because it can be rendered from any POV. Wireless mikes sound “close,” and you will try to boom mike as closely as possible, too. With every channel iso’d, there is the freedom in Post to mix them in any proportion, but remember that your work is normally judged in dailies. (Although nowadays, that usually means the immediate playback of the take.)
2. For your production mix, however, you will have to make certain choices without knowing what perspective image it will be mated to. EXCEPTION: When a virtual camera is in use, if you can see or be told, what the composition is, by all means use that perspective, because it will most likely be seen (and heard) that way first, as in dailies.
3. The biggest problem (IMHO) concerns overlapping dialog when the characters are separated in the volume by a large distance. If you don’t have the virtual camera info mentioned above, try to imagine what the composition of the rendered shot(s) will be. Is a main character speaking with a secondary one? Then the main character will probably get the most screen time. Is one character reacting more emotionally than the other? Then they will probably get the close-up.
4. After you have determined (made your best guess) which character will be featured, mix them just noticeably hotter than the other one. The separation in levels should be just large enough that the lower level dialog doesn’t muddy the higher level dialog, but no more. Since both actors are close-mic’d, if they happen to feature the secondary one, the overlap will still work. EXCEPTION: If you know the purpose of the overlap, assign the higher level to the appropriate character’s dialog. This will call attention to the overlapping character, but that’s the reason for the overlap in the first place.
 In addition to the usual noise problems on a live-action stage, the volume has some unique ones:
1. The area lighting is often supplied by ordinary fluorescent lamps, and many of them have older magnetic ballasts that emit 120 Hz hums and buzzes. Modern electronic (high-frequency) ballasts are usually quiet enough, and are available as direct replacements for the older magnetic ones.
2. There are usually a great number of computers on the stage, and their cooling fans are a significant source of noise. If the facility has been in existence for some time, this may already have been dealt with. If not, plywood baffles, covered with sound-absorbing material on the side that faces the computers, should quiet them sufficiently.
3. Some volumes’ floors are carpeted to eliminate footstep noise, but unfortunately, some are not. An adequate stock of foot foam should be on hand for this eventuality. Be sure to remove any dust or other loose material from the shoe soles before attaching the foam. I have found that repeatedly wiping the soles with the sticky side of gaffer tape, using a new length of tape each pass, does an outstanding job of preparing them. An expedient method when time is limited is to slip heavy wool socks over the shoes. You may have to cut holes in the socks for the foot markers. Unfortunately, the socks can slip around, and also have less traction on the floor than rubber soles. I keep a dozen 2’ x 5’ carpet rolls on my follow cart, and these can be laid down along the path taken by the actor(s) during the rehearsal. (Of course, they never deviate during the take.) Normally, the strips are taped in place, but when time is short, they can be attached with staple guns (unless the floor is concrete). IMPORTANT: Roll up the carpets with their upper surface out—this makes the strip curl downward when it is laid out, so the ends hug the floor and do not curve up to present a tripping hazard.
4. The floor-contour modules are another source of footstep sounds. Some of them are carpeted, but can still produce dull, hollow thumps from the impacts of running or jumping (which video games seem to have in abundance). The un-carpeted platforms are particularly loud. If at all possible, arrange to have them carpeted before shooting begins. Both types of modules benefit from having the underside of the top surface sprayed with sound-deadening material, such as automotive underbody coating. Using thicker (and unfortunately, heaver) plywood for the upper surface makes a big difference, too. During shooting, carpet strips can be utilized on the modules in the same manner as on the floor.
5. Front-projection video projectors have cooling fans that can be problematical. Ask if their use is absolutely necessary. Check in their menus to see if they have a “lownoise/ low-speed” option.
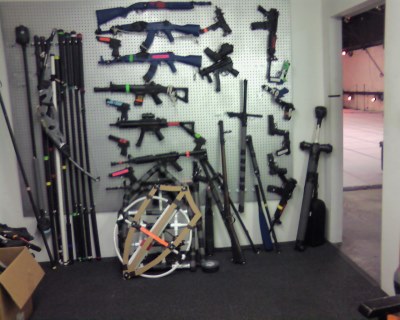
6. Props (and some set dressing) are usually not the real objects they represent. Rifles are plastic or wood pieces shaped like the guns they represent, or toys or air rifles.
A solid oak dining table may in fact be only a row of folding card tables of the same height and overall size. Be alert to any sounds they produce—an object set down on the card table (not on a line) may make an effect at the appropriate level, but the sound will not be appropriate to the nature of the CGI-heavy wood table. There are two schools of thought in dealing with this: 1, eliminate as much noise as possible by padding the table so the effects cutter will have a clean room tone to lay the correct effect into; and 2, leave the production effect in, as a guide to synchronization when laying in the new effect. I suggest discussing the matter with Post ahead of time, but my personal preference is number 2, because the presence of the padding will affect the manner (body motion) in which the actor sets down the object. Of course, if the inappropriate sound is on a line, either pad the table or object, or record some clean wild lines.
Capture Procedure
When a capture scene begins, the actors will start by spreading out and taking a “T-pose” near the edge of the volume. If you haven’t been given a specific “Roll sound,” this is the time to go into Record. An added precaution, be sure to set your recorder’s pre-roll to the maximum time. T-pose is a standing position with the legs slightly spread and the arms extended horizontally, which allows the capture techs to see that the system has properly recognized all the markers. The techs give the okay, the actors will take their proper positions in the set and then the director will call “Action.”
At the end of the shot, after the director calls “Cut,” the actors will again move out and take the T-pose. When the capture techs are satisfied, they will announce that the capture system is stopped, and then you can stop recording.
The primary difference between a capture shoot and any other type is that you won’t have much free time once the process starts. Unlike live-action, there is no setup time for camera and lighting. And there are no setups for alternate camera angles, or retakes for bad camera moves, flyaway hair, or any of the multitude of other delays sound is used to. Once the scene has been performed to the director’s satisfaction, the action will move to the next one, which again requires no re-lighting, new camera setups, wardrobe changes, or makeup and hair. If any set or prop changes are necessary, they can be accomplished in a few minutes. Plan your bathroom breaks accordingly.
This high-density work can generate many GB of audio, so be sure to have a large amount of pre-formatted media on hand. Depending on your particular recorder, you may have your on-set archive on an internal or external hard drive, or a CF or SD card. Most productions want audio turned in on a flash memory card. SD cards are much cheaper than CF cards (and all those tiny fragile pins in the CF card socket scare me). If you are using a Deva with only CF card slots, consider an external SD dock into the Deva’s FireWire port. Depending on the particular job, you may or may not be required to turn in the flash card(s) during the day or at wrap. The audio may be imported immediately and the card(s) returned to you, or they may be kept overnight or longer. Use only ‘name-brand” cards, as the wear-leveling algorithms on the cheap ones can cause premature failure, with the possible loss of all your data.
The director may have several options to monitor the scene during capture:
1. The live video from the reference cameras.
2. A crudely rendered live CGI frame, with a fixed POV chosen in advance.
3. Using a “virtual camera,” pioneered by Cameron on Avatar. This is a small, handheld flat-panel monitor equipped with reflective markers. The capture system knows its location and the direction it is pointed, and renders a live CGI frame from that POV and “lens size.” The director can treat it as a handheld camera, pointing it as though it was a real camera in the virtual world. Incidentally, the camera does not have to actually be pointed at the actors—the GCI world seen by the virtual camera can be rotated so that the camera can be aimed at an empty part of the stage to avoid distractions. Another feature of the virtual camera is a “proportionality control.” Set to 1:1, the camera acts like a handheld camera. At 10:1, raising the camera two feet creates a 20-foot crane shot. With a 100:1 ratio, it is possible to make aerial “flyover” shots, because the entire extent of the virtual world is available in the computer’s database.
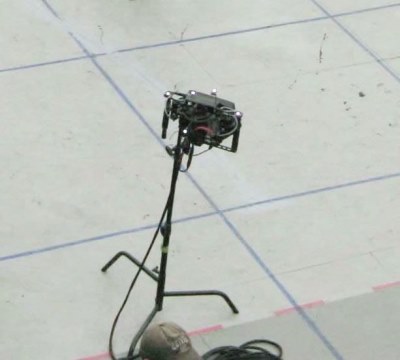 When a virtual camera is in use on a multi-day shoot, the capture days may not be contiguous. After a certain amount of capture has been done, the main crew and cast may be put on hiatus while the director wanders around the empty capture stage with the scene data being played back repeatedly. The crudely rendered video will appear in the handheld monitor, from the POV of its current position. The director can then “shoot” coverage of the scene: master, close-ups, over-the-shoulders, stacked-profile tracking shots, etc. This procedure ensures that all the angles “work.” If not, the director has two options: re-capture the scene on another day; or fix the problem in the computer by dragging characters into the desired position and/or digitally rearranging the props, set or background.
If this is the case, you have two choices: wrap your gear at the end of each capture session, and load in and set up at the beginning of the next one; or leave your gear in place during your off day(s). The trade-off is between the extra work (and payroll time) of wrapping and setting up, and the danger of the theft of the gear, or your getting a last-minute call for another job on the idle day(s). If you elect to leave your equipment, see if you can get a “stand-by” rental payment. Even if this is only a token amount, it establishes a precedent, and you may be able to raise the rate on the next job.
Conclusion
In addition to on-the-job training, if you know another mixer who will let you visit a capture set, take advantage of the opportunity as soon as possible. I probably would have not survived the first day of my first capture job (Avatar) if it were not for Art Rochester, who kindly let me shadow him before he left the show. I also got many hours of coaching from William Kaplan, who mixed the show before Art, and let me use his regular Boom Op, Tommy Giordano, to help with the load-in and setup of my gear. Bill also sent his son Jessie to work with me on the set. If at all possible, hire a boom op who has capture experience. (Note to boom ops: list your capture experience in your 695 directory listing.)
I wish you an absence of bad luck, which is more important than good luck in this business.
Text and pictures © 2014 by James Tanenbaum, all rights reserved.
Avatar set photo ©2009 Twentieth Century Fox. All rights reserved.